You may have heard talk about Instagram Reels being a mere copycat of the video-hooking platform we all know and love as TikTok. Yet, we’re here to confirm that Instagram’s recent video feature is actually becoming the business model we didn’t know we needed.
Brands can now benefit from a wider reach by increasing visibility via the Explore page, thus attracting more users and having way better odds at gaining a loyal following.
The great thing about having heightened visibility is that there is more space to play with creativity. Rather than a static image, Reels allow viewers to witness the product at different angles. In other words, instead of cramming as much product information as possible, having to prioritize one idea over another, or even dealing with multiple campaigns each highlighting a different product perk, brands can do it all thanks to the motion and flexibility that Reels offer.
Today we’ll be delving deep into the minutiae of Reel creation, walking you through the before, during and after of the video posting process.
Coming Up With the Perfect Reel
Brainstorm the concept of your Reel by looking back at what worked and what didn’t. Perhaps this new Reel might simply require a minor touch up while others may have to rethink their entire vision.
It’s normal for it to take some time before pinpointing your exact niche. Just remember that Reels must be in 9:16 format with bright and high quality visuals. Putting two in two together, you’ll end up having a short – yet impressive – perfectly addictive Reel.
Templates, Filters & Effects Galore
Instagram is currently next level with its creative options. While coming up with your idea, preview which Reel templates, filters and/or effects you could incorporate or, at the very least, be sources of inspiration.
Reel Templates
Reel templates were mainly designed by other creators on the platform, who then made them available to general users. Templates are especially remarkable for making quick Reels since you can use the exact same audio and clip timing for your content.
Often creators will make a template according to trends, so previewing them beforehand can provide further clarity for your proof of concept while also just making your editing life so much easier.
Tip: If you don’t see this feature yet, you might need to run an update otherwise you should expect to see it soon!
Time lapse Videos
Time lapse videos can be done by simply adjusting the speed to 4x on the Reels maker as you’re about to film. They’re efficient and immediately engaging as scrolling is a fast-paced, attention span game.
Green Screen Effect
Needless to say, the green screen effect allows you to film yourself in front of any photo or video background. It’s also the best tool to use when wanting to reference a particular photo or video.
Using Audio in Reels
The creativity implied in getting the perfect audio can be just as challenging as finding a video concept. However, it can also be just as effortless since brands often use trends and trending sounds that have already gone viral as inspiration for content or as the content idea itself.
There are also a vast array of voice filters and sound effects you can use when recording your voice over. Incidentally, it is strongly recommended to have a voice over in every Reel if applicable. Coupling it with the visuals of the video makes for a Reel that is easy to follow, appealing to the users’ senses.
Spot the arrow pointing up next to the sound title, it indicates that this sound is trending.
This Reel uses text on the image and a voice-over to make sure users understand the message, with or without sound.
Click on the track title to see how many Reels have been created using this audio. For example, this popular sound has been used almost 500K times.
Recording the Reel
This is the fun part – bringing your concept to life. You can either record the Instagram Reel in real-time or upload a pre-edited video.
To record a new Reel directly on the app, you can either:
- Tap the + icon in the top right corner of your home or profile page;
- Tap on the camera on the top right within the Reels section;
- Or swipe right from the home page.
Then all you have to do is Click the Reel button!
While filming, keep in mind the duration you decided upon in coming up with your concept. Successful creators often advise to keep Reels short and sweet, between 15 to 30 seconds in length.
5 Musts Before Posting Your Reel
1. Always include an audio sound or song in the video.
Even if you don’t plan to use a sound or song in your video, it is strongly recommended to play with the audio volume so that a trending sound is unnoticeably associated with your video. Having that trending sound, even at 0 decibels, will augment a Reel’s exposure and determine to which degree it should end up on the Explore page.
2. Optimize for accessibility.
By adding on-screen text (captions) and a voice over, you’re also widening your reach as you’ll get the attention of the visually impaired and the hard-of-hearing.
Furthermore, users are more likely to scroll past your video if your text is not centralized and visible. Often, we see Instagram features covering the text and effectively describing a product or following directions becomes challenging and demanding.
3. Add a title to the cover image of the video.
A good thumbnail or cover image asks for a clear-cut title that tells viewers right off the bat what you’re presenting. You can choose to either edit the thumbnail by selecting a time stamp in the Reel that tells exactly what the video is about, or you can directly upload your own cover image directly from your camera roll. However, similar to the on-screen text, make sure that the image looks good on both the profile grid and Reels feed.
4. Captioning a Reel
It’s important to note that captions (especially the first line) should be short, straight to the point, and engaging, while also making an impact. The implementation of relevant hashtags is also beneficial, the recommended amount being between 3 and 10 hashtags.
5. The Most Optimized Reel Settings
Lastly, before posting the final product, ensure that you switched the “Also share to Feed” option as well as the “High-Quality Uploads” under the advanced settings.
How to add a voiceover to your Reel.
How to add captions to a Reel.
How to set the right settings for a high-quality reels
What to Do After Posting a Reel
The job’s not done! There are several practices you should get used to doing after posting a Reel.
You’ll first want to pin and remix the 3 best Reels that welcome and direct new users. It’s also a chance for your brand to tell a story of exactly who you are and what you stand for.
Once the comments start flowing in, you can decide to pin up to 3 comments. Use this as an opportunity to highlight that your brand truly engages with people. Examples could be comments that show appreciation for the video’s message, have received the most likes or encourage other followers to interact.
Finally, remember to post consistently. If you found your niche and people like your Reels but have to wait an unpredictable amount of time to view content from your brand, you’ll have a higher chance of losing them.
Additional and Optional Features for Reels
You’ll come to learn that Instagram is constantly changing and adapting to user demand. As a result, there are many additional features you can decide to include in your Reels. Here are just a few:
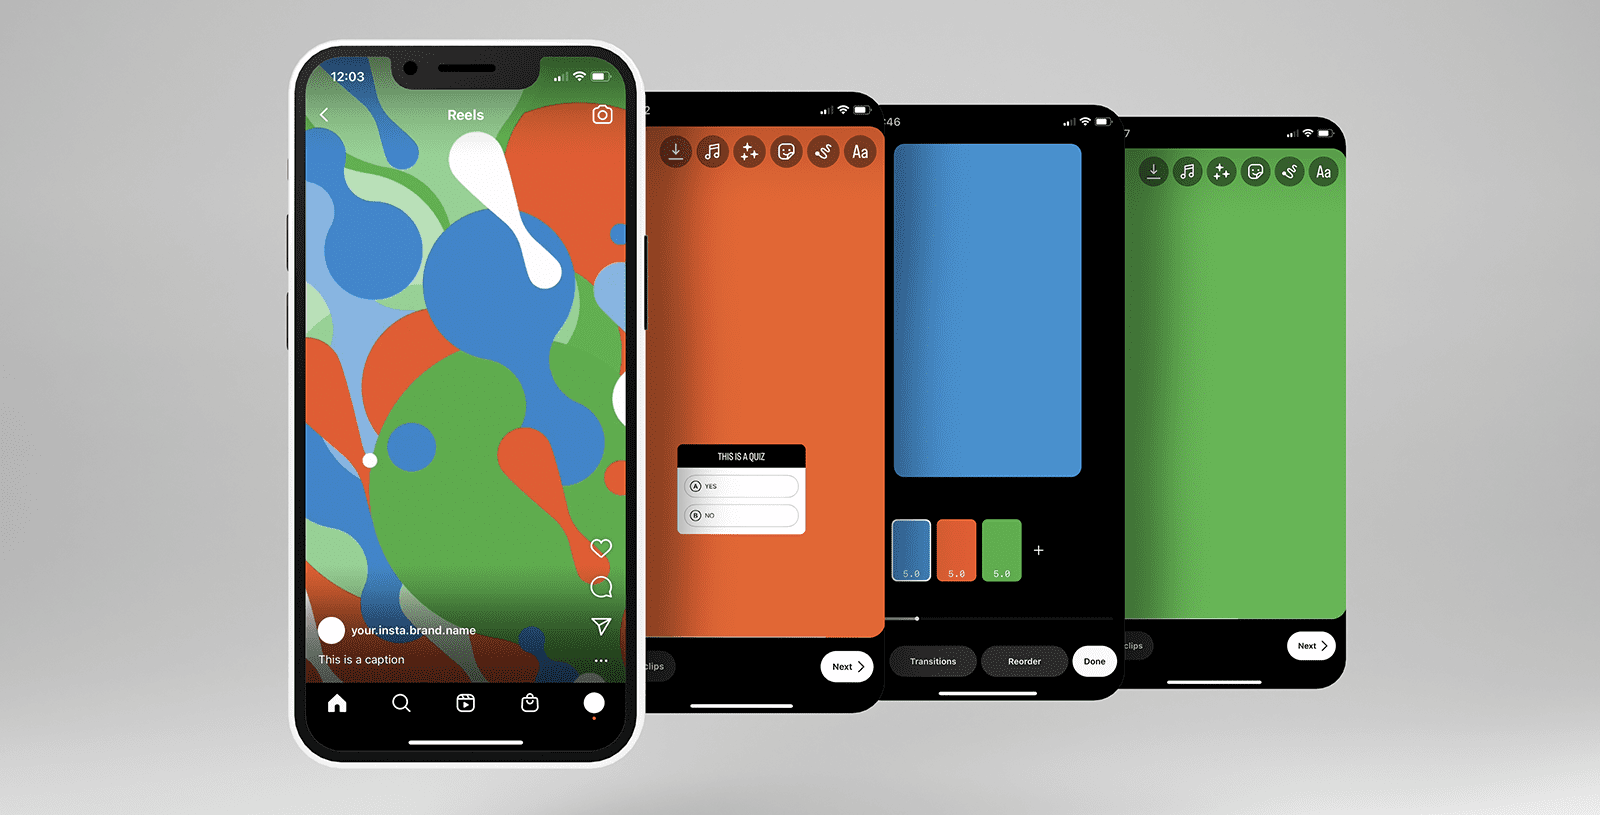
- An engagement widget: poll, add yours, quiz, sliding scale icon, or visually respond to comments;
- The video location;
- A tag associating brands and users (if applicable);
- Turning Instagram highlights into Reels.
Add a widget like a poll to increase engagement.
Add a location for additional chances of getting seen.
Tag a person or another business or invite a collaborator (the Reel will be accessible on their profile as well).
Conclusion
From beginning to end, you might have stated the decently lengthy process in creating a Reel. There are many elements to keep in mind during this process, but as you create more Reels and start posting consistently, those elements will be so deeply-rooted in your work method that the process itself will become easier – even coming up with the most original concepts.
Should you have any questions or require assistance in getting started, our social media experts would be more than glad to help. Reach out!
Subscribe to The Shift Factor
Our newsletter keeps you in the know on marketing’s biggest shifts and real examples of brands adapting.
ABOUT THE AUTHOR
Marie-Joëlle Turgeon
Marie-Joelle works at Bloom, a digital marketing agency, as the Director of Marketing. She's passionate about digital marketing tactics (from social media to web design) for B2B businesses looking to grow online.


Share this: